The best photo for AI gender swap is a sharp, front-facing portrait of one adult, in soft even light, with the whole face visible and no beauty filter. That one choice matters more than any setting. The model can only keep what it can see: if shadows, glasses glare, a hat brim or a steep angle hide part of your face, the AI has to guess, and guesses are where results start to look like someone else.
Use this page as a checklist before you upload, and as a troubleshooting guide when a result looks off.
Best photo for AI gender swap: quick checklist
| Check | Good | Avoid |
|---|---|---|
| People | One person | Group shots, a second face in the background |
| Angle | Straight on, camera at eye level | Strong side profile, low selfie angle, tilted head |
| Light | Window light, overcast daylight | Harsh sun, one bright lamp, strong backlight |
| Face | Fully visible, forehead to chin | Hair, hands, hat brim or sunglasses covering features |
| Sharpness | Original camera file, in focus | Screenshots, heavy compression, motion blur |
| Editing | Unedited or lightly edited | Beauty mode, face-slimming, strong filters |
| Expression | Relaxed or a natural smile | Squinting, wide-open laugh, exaggerated faces |
GenderFlip accepts image files up to 10 MB. Use only adult portraits you own or have permission to edit.
Why the photo matters so much
An AI gender swap does not paste a different face onto yours. It redraws the portrait while trying to keep your identity: eye shape and spacing, nose, expression, skin tone and the overall structure of the face, while changing hair, jaw and brow emphasis, facial hair and styling. To keep identity, the model needs a clear view of those features. Missing or distorted information gets filled in with something generic, and generic is exactly what makes a result look like a stranger.
Lighting: the biggest single factor
Shadows are read as shape. A dark band under the cheekbone can turn into a sharper jaw; a bright overhead light can deepen eye sockets and change how old or masculine the result looks.
Works well:
- Facing a window in daylight, without direct sun on your face
- Outdoors on an overcast day or in open shade
- A soft lamp or ring light in front of you, slightly above eye level
Causes problems:
- Midday sun with hard shadows under the eyes and nose
- One lamp to the side that leaves half the face dark
- A bright window behind you, which turns the face into a silhouette
- Mixed coloured light (for example a purple LED on one side)
Angle: straight on beats everything
A front-facing photo with the camera at eye level gives the clearest view of both eyes, both sides of the jaw and the hairline.
- Straight-on portrait: the most reliable starting point for both directions.
- Slight turn (up to about a three-quarter view): usually fine, and sometimes more natural for a profile picture. Both eyes should still be visible.
- Full side profile: much harder. The model sees only half the face, so the hidden side, jaw width and eye shape are inferred. Expect more variation and try a frontal photo first.
- Low-angle selfie: exaggerates the chin and nostrils and shortens the forehead, which can push a female to male result toward a heavier jaw than you have.
- Steep high angle: enlarges the forehead and eyes and narrows the chin, which can make male to female results look younger or cartoonish.
For male to female, a straight-on or slightly turned portrait in soft light shows the jaw and brow clearly so the model can soften them without losing your face. For female to male, keep the camera at eye level and the jawline visible; hair pulled away from the jaw and temples helps the model place a believable hairline and jaw. See the female to male guide for direction-specific checks.
Framing and sharpness
- Head and shoulders is ideal. The face should fill a good part of the frame. A full-length photo where your face is tiny gives the model very little to work with.
- Use the original file. Screenshots, images saved from social apps and heavily compressed files lose fine detail around the eyes, hair and skin.
- Check focus. Zoom in on the eyes. If they are soft, the result will be soft too.
- Avoid tight crops that cut the chin or hairline. The model needs the edges of the face.
Filters, beauty mode and editing
Beauty filters smooth skin, enlarge eyes and slim the face. The model treats that as your real face, so the result inherits the distortion and can look plastic. Turn off beauty mode in the camera app and avoid photos already run through face-editing filters. Light colour correction is fine.
Expression
A relaxed face or a natural closed-mouth smile gives the most consistent results. Big laughs, squints and strong expressions stretch features, and the model may keep the stretch as if it were your bone structure. If you want to keep a smile, keep it natural; the example below kept the smile through a female to male swap.
Glasses, makeup and beards
Glasses can work, but they hide part of the eyes and brows, which are key identity features. Clear, thin frames work better than thick or tinted ones, and glare across the lens is the most common problem. The model may also change or remove glasses in the result. If the first result looks off, try a photo without them.
Makeup is usually fine when it is natural and balanced. Heavy contouring changes the apparent shape of the cheeks, nose and jaw, and the model will treat that shape as real.
Beards and heavy stubble are the hardest feature for male to female results because they cover the jaw and lips the model needs to reshape. A clean-shaven or lightly stubbled photo gives a more natural result. For female to male, added facial hair is generated rather than "kept", so check its edges closely.
Hats, hair and shadows across the face
A cap or wide-brimmed hat shades the forehead and eyes and hides the hairline, which is one of the main features that changes in a gender swap. Hair falling across one eye or the jaw has the same effect. Push hair back from the face and remove hats for the most reliable result. A beanie that leaves the face clear and evenly lit is usually less of a problem than a brim.
Old photos and low light
Old prints and dark photos can work if the face is still clear.
- Scan prints at a high resolution, or photograph them flat in daylight without glare.
- Use the best original you have instead of a copy of a copy.
- Expect softer results from grainy or very dark images; the model cannot restore detail that is not there.
- Very small faces in old group prints rarely work well; crop to one person only if the face remains sharp after cropping.
Group photos: one person per photo
Group shots fail more often because each face is small, people overlap, and lighting differs across the frame. The tool may also edit the wrong person or blend features. Crop to one person, or better, use a separate portrait of each person. Get each person's permission before editing their photo.
Example: what a good input looks like
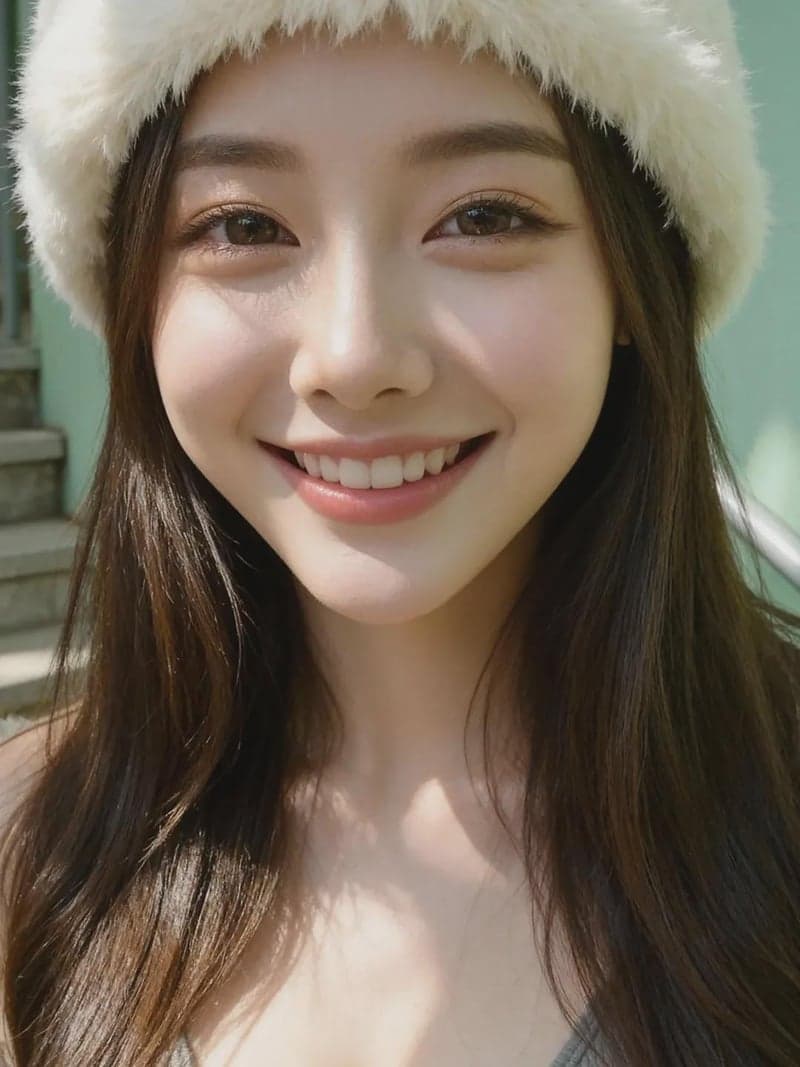
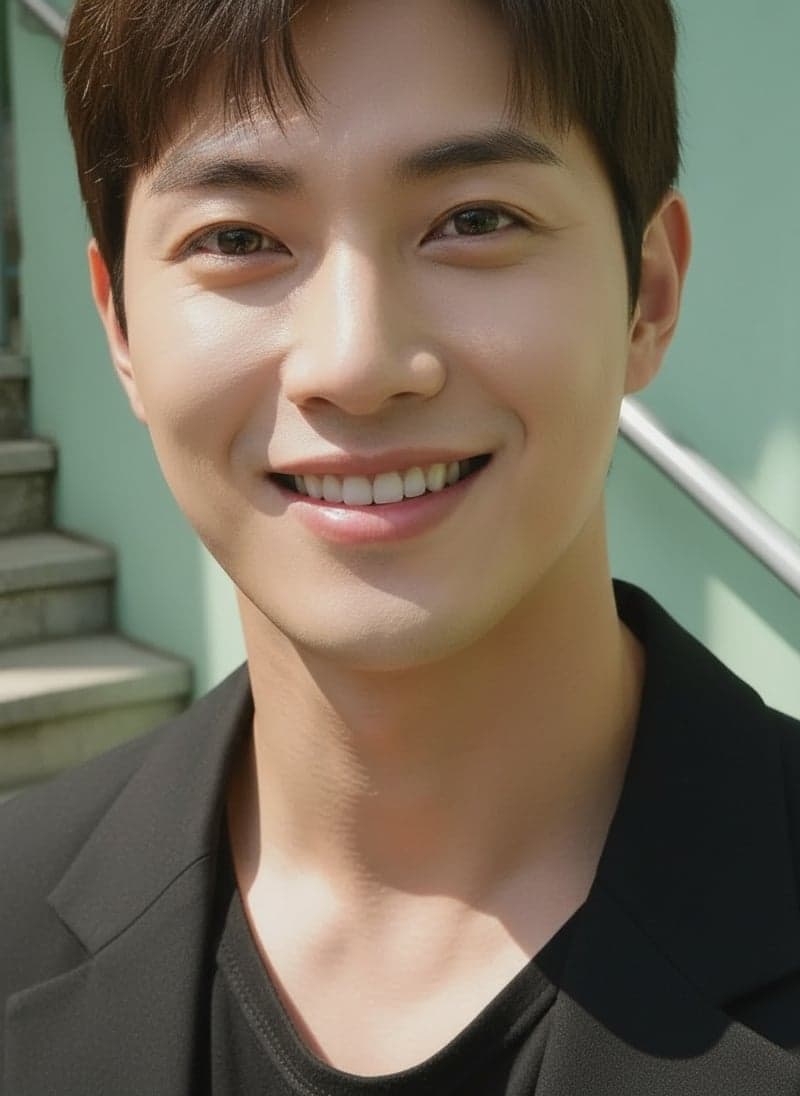
A front-facing, evenly lit portrait with a natural smile. The smile, pose and background carry through; the hat, hairstyle and clothing change. Results vary from photo to photo.
If the result looks wrong: symptom, cause, fix
| What you see | Likely cause | Try this |
|---|---|---|
| Looks like a different person | Angle, shadows or filters hid key features | Use a frontal, evenly lit, unfiltered photo |
| Looks generic or "stock photo" | Low resolution or a small face in the frame | Use the original file and a head-and-shoulders crop |
| Plastic or waxy skin | Beauty mode or heavy smoothing in the input | Use an unedited photo |
| Jaw or chin looks too heavy | Low camera angle | Retake at eye level |
| Odd eyes or glasses artifacts | Glare, thick frames or tinted lenses | Try without glasses or with clean, thin frames |
| Hairline looks pasted on | Hat brim or hair hiding the forehead | Remove the hat and push hair back |
| Wrong person edited | Group photo | Crop to one person or use a solo portrait |
For more on likeness, see realistic gender swap results that keep your face. If the result is recognisable but bland, read what to do when a result looks too generic.
Try it with your photo
Pick the direction you want: male to female or female to male, or use the online generator for both. Sign up for 1 free standard generation; the free result is a watermarked preview up to 768px on the longest side, and any one-time credit pack unlocks the full-resolution original. Because results depend so much on the input, it is worth testing your best photo first.
FAQ
What is the single most important tip?
Soft, even light on a front-facing face. Most bad results trace back to shadows or angle, not to the AI.
Can I use a selfie?
Yes. Hold the phone at eye level, face a window, turn off beauty mode, and keep your face filling a good part of the frame.
Does a three-quarter angle work?
Usually, as long as both eyes are visible. A full side profile is much less reliable.
Should I take off my glasses?
If you can, try one photo without them. Thin, clean frames often work, but glare and thick frames are a common cause of eye artifacts.
Why does the same tool give good and bad results?
The input changes. The same model can produce a natural result from a clear portrait and a strange one from a dark, angled or filtered photo. Try your best photo before judging the tool.